
New to Propagate Lab: check out our Seltzer Kit containing everything needed to make an award-winning seltzer!


Lesson 3: An Introduction to Malt
Module 3: Malt
An Introduction to the Ingredient Malt
The goal of this section is to provide an overview of malt, the malting process,
and the role malt plays in brewing.
- Describe the different types of malt used in brewing
- Outline the malting process
- Select the proper malts for a recipe
Introduction
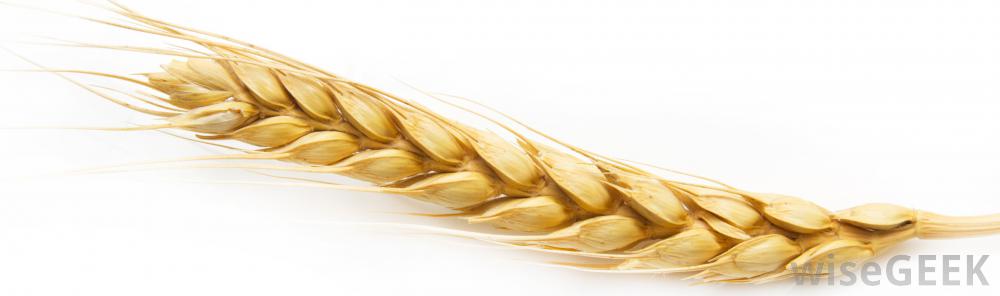
As you recall from the first module, malt is one of the four main ingredients in beer.
Last week, we worked on calculating how much malt you need for a recipe. The factors
we considered were sugar content, moisture, brewhouse efficiency, and the percentage
being used in the mash bill. Today we will learn about the many additional considerations
when picking a malt variety for brewing — including color, flavor, and protein content.
We will take a look at these attributes, as well as the malting process, in this module.
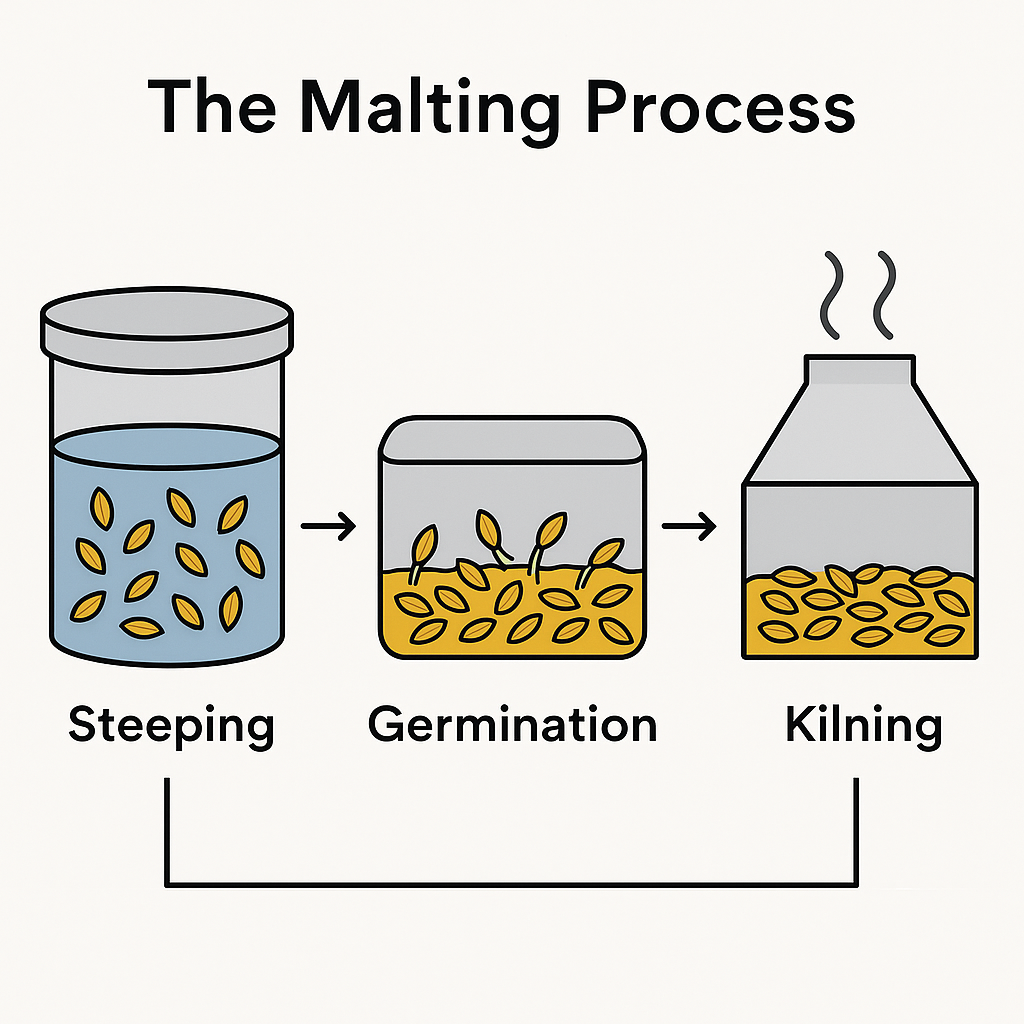
Malting
We are now ready to move onto the malting process. Almost any grain or seed can be malted — it’s simply a three-step process used to force a seed to sprout, prepare to grow, and then be halted shortly after germination. When I say almost any seed, I mean it. You can purchase malted wheat, malted sunflowers, malted oats, even malted peas — all of which go through the same three stages.
There are multiple ways to move through these steps, particularly during germination, which can vary in duration and technique depending on the maltster’s needs. Let’s take a look at each step and see what’s happening to the barley at each stage.
Cleaning
Before the barley can enter the malting process, it needs to be cleaned and sorted.
It arrives from the field with dirt, bugs, bird droppings, and other debris. It may
also contain small stones, bits of metal, and other non-organic materials from harvesting.
Typically, the barley goes through a series of conveyors that shake and sort the
grain to remove anything that isn’t barley — magnets pull out metal fragments, and
screens remove smaller debris.
Sorting by kernel size is also important. If the maltster wants the barley to
germinate evenly, all kernels must hydrate and sprout at the same rate. Uniform
kernels of the same plumpness hydrate evenly, while thin or broken kernels are removed.

Steeping
Now that the barley is clean and sorted, it can be steeped. This process soaks the
barley in clean water to hydrate the kernels and remove any remaining dirt.
The barley is steeped over 2–3 days, during which it absorbs 42–48% moisture. It’s
important to note that during steeping the barley isn’t continuously submerged — instead,
it’s soaked and drained repeatedly. This cycle allows the grain to “breathe,” providing
oxygen that the awakening kernels need.
Temperature control is also crucial. If the barley gets too hot, it will die.
Temperature is managed by adjusting the water temperature during each soaking cycle.
Germination
The steeped barley is now moved to a germination chamber. The key factors for successful
germination are temperature control and proper aeration. Barley typically germinates for
3–5 days, depending on variety and conditions.
During germination, the hydrated barley begins to grow — both rootlets and shoots
(acrospires) elongate. Plant hormones (like gibberellic acid) trigger the breakdown of
starch and protein reserves, while internal cell walls break down to release starch
granules. This modification makes the starch accessible for enzymatic conversion during
mashing.
Once the desired level of modification is reached, the germination phase is complete.
Types of Germination Equipment
Let’s briefly look at the main types of germination systems:

Saladin Box
Large rectangular compartments with mechanical turners and aeration systems.
Pros: Great control over conditions, scalable.
Cons: Higher capital investment.
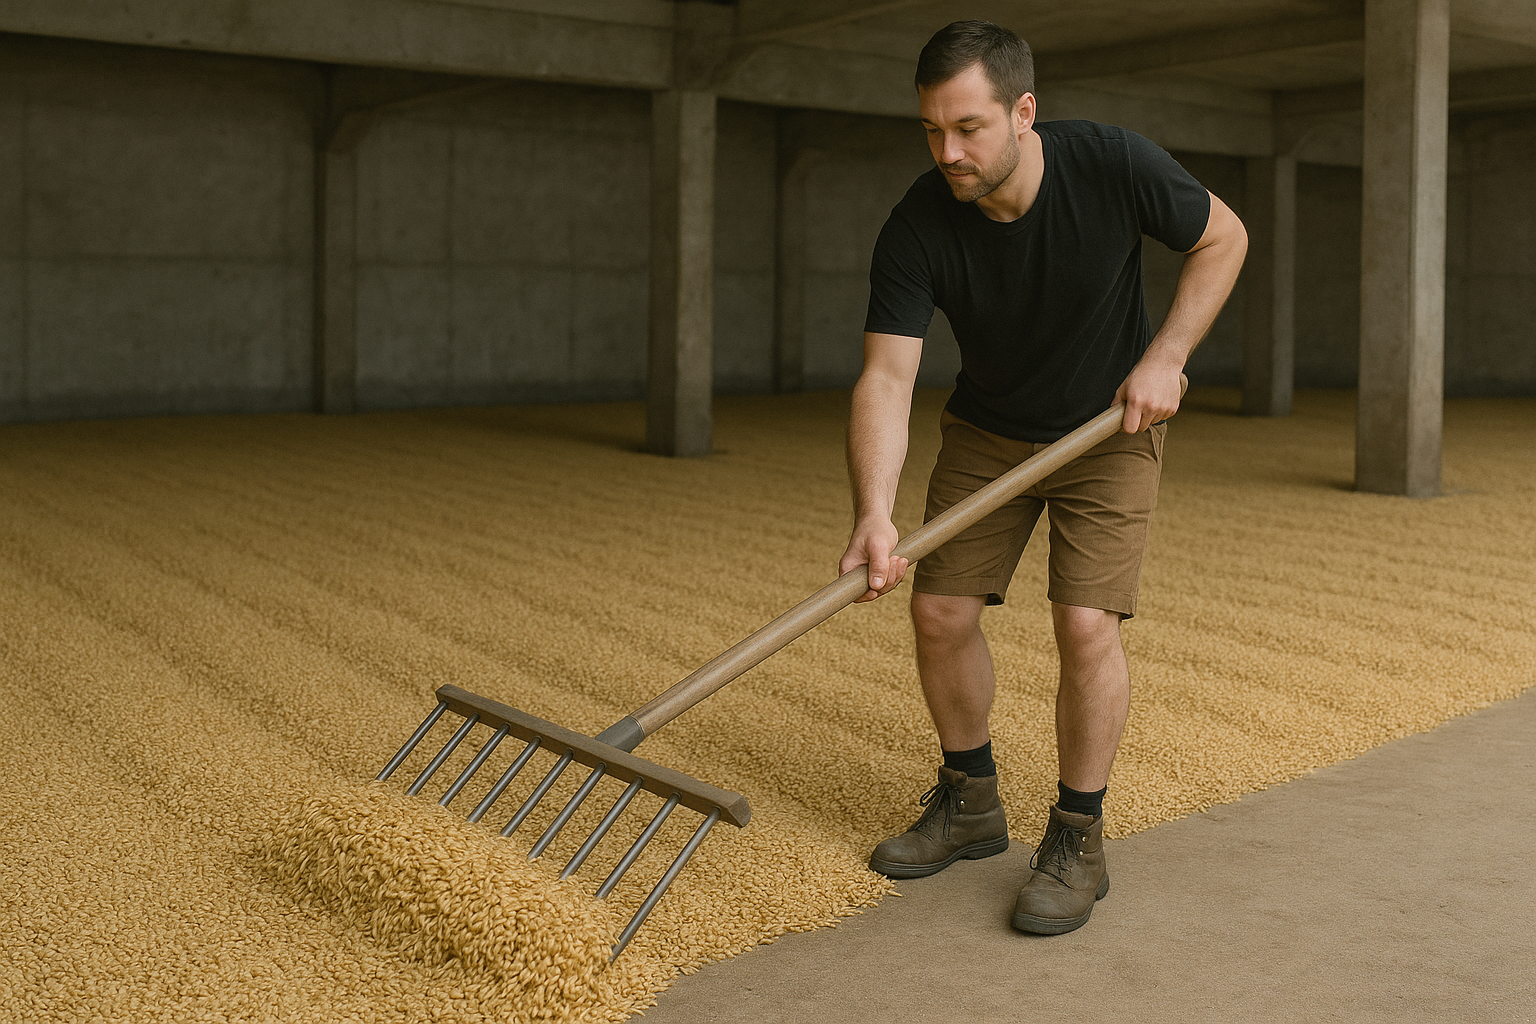
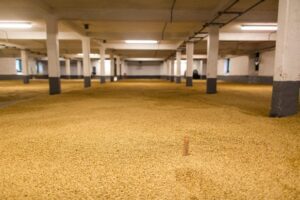
Floor Malting
Traditional method where barley is spread across large floors and turned manually.
Pros: Low-tech, artisan approach.
Cons: Labor-intensive, harder to control temperature and aeration.
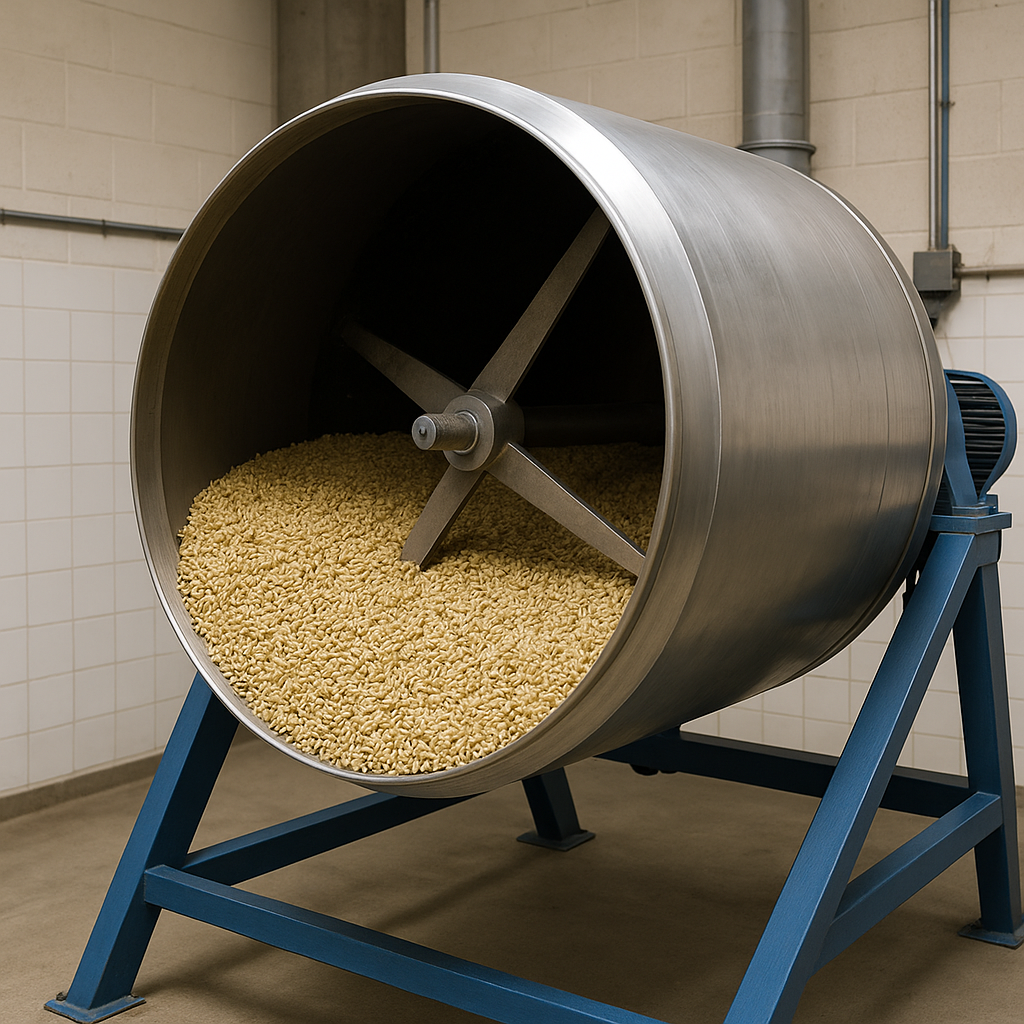
Rotary Drum
Cylindrical drums that rotate to mix and aerate the grain bed continuously.
Pros: Even germination, efficient aeration.
Cons: Higher maintenance complexity.
What Happens Inside a Barley Kernel During Germination
Malting is the process of controlled germination followed by kilning.
During germination, the barley kernel “wakes up” and begins transforming its internal structures
to support new plant growth. These same biochemical changes give brewers access to the enzymes
required to convert starches into fermentable sugars.
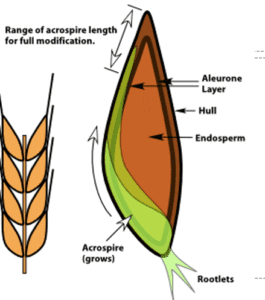
Key Structures Inside the Kernel
- Husk – Protective outer layer that remains intact; acts as a natural filter bed during mashing.
- Aleurone Layer – Enzyme-rich layer that releases amylases and proteases once germination begins.
- Endosperm – Starchy interior; this is the fuel source that brewers later convert into sugars.
- Acrospire – Growing shoot beneath the husk; length is a key indicator of malt modification.
What Happens During Germination
1. Water Uptake (Steeping)
The kernel absorbs water, respiration increases, and rootlets begin to form.
2. Enzyme Release in the Aleurone Layer
The aleurone layer activates and releases α-amylase, β-amylase,
proteases, and β-glucanases to break down the endosperm.
3. Endosperm Modification
Enzymes dissolve cell walls and proteins, exposing starch granules. This makes the malt
fully mashable and increases extract potential.
4. Acrospire Growth
The developing shoot feeds on the modified endosperm. Maltsters monitor acrospire length to
determine when germination is complete.
Why This Matters for Brewers
Germination unlocks the enzymatic machinery that makes brewing possible. Properly modified malt
ensures that starches convert efficiently, improves lautering, and creates the fermentable profile
needed for consistent beer quality.
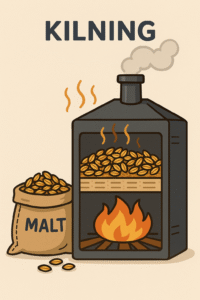
Kilning
After germination, the green malt is transferred to a kiln for drying. Kilning halts the germination
process and reduces the moisture content of the malt, making it stable for storage and ready for brewing.
This step also plays a crucial role in developing malt flavor, color, and aroma.
Kilning occurs in stages:
1. Free Drying Phase: Warm air (50–60 °C) gently reduces moisture from ~45% to 10–12%.
This phase preserves vital enzymes.
2. Forced Drying Phase: Hotter air (65–75 °C or higher) dries malt to its final
3–5% moisture, stabilizing it and developing flavor precursors.
3. Curing Phase: Some malts undergo a final high-heat stage (80–105 °C) to promote
Maillard reactions. This creates toasty, biscuity, nutty, or rich malt flavors.
The kiln operator controls airflow, temperature, and timing to craft malts with specific flavors, colors, and performance characteristics.
After Kilning: Post-Malting Steps
After kilning, the malt is not yet ready for brewing. It must first go through a few final processing steps to ensure quality and usability in the brewhouse.
1. Deculming
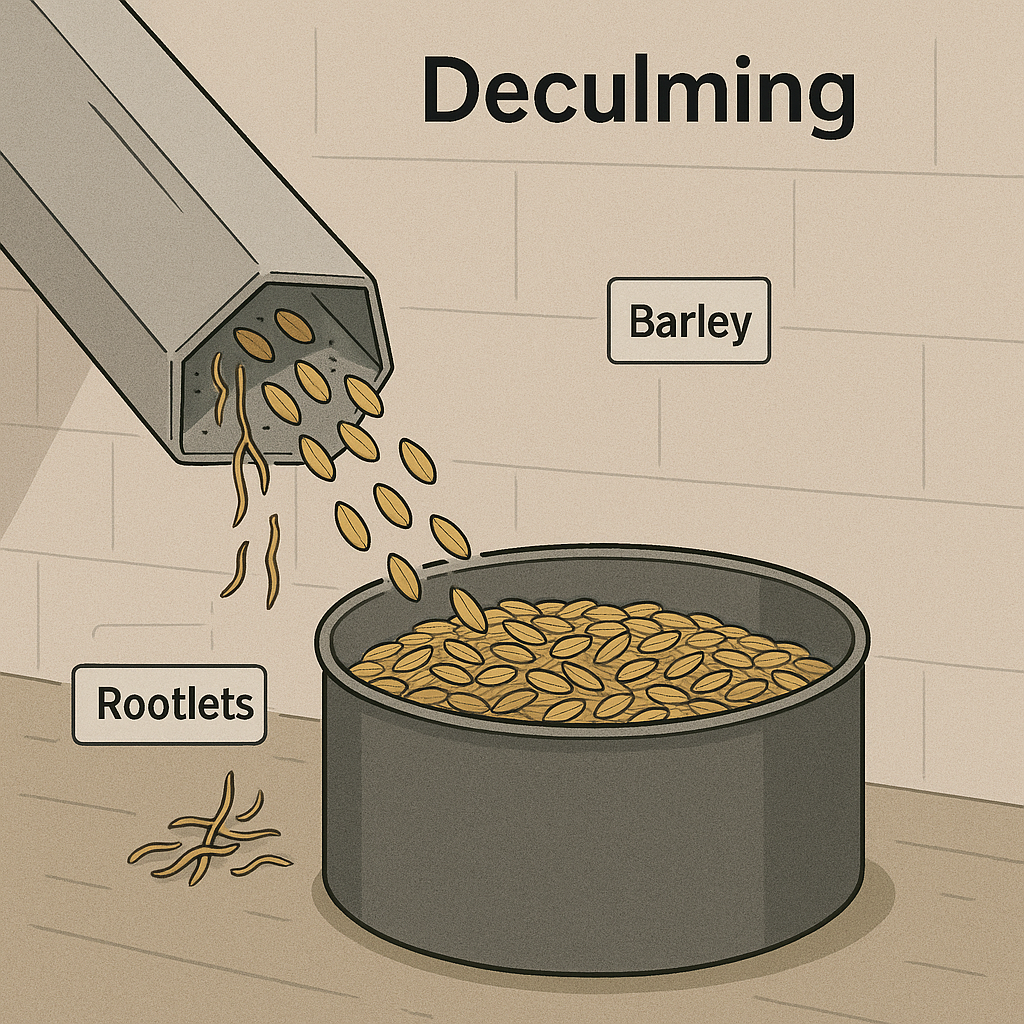
During germination, rootlets—also called culms—form on the barley kernels. In the deculming process, these are removed using screens or air classifiers. The rootlets are collected as a byproduct and are often repurposed for animal feed.
2. Malt Analysis (Quality Control)
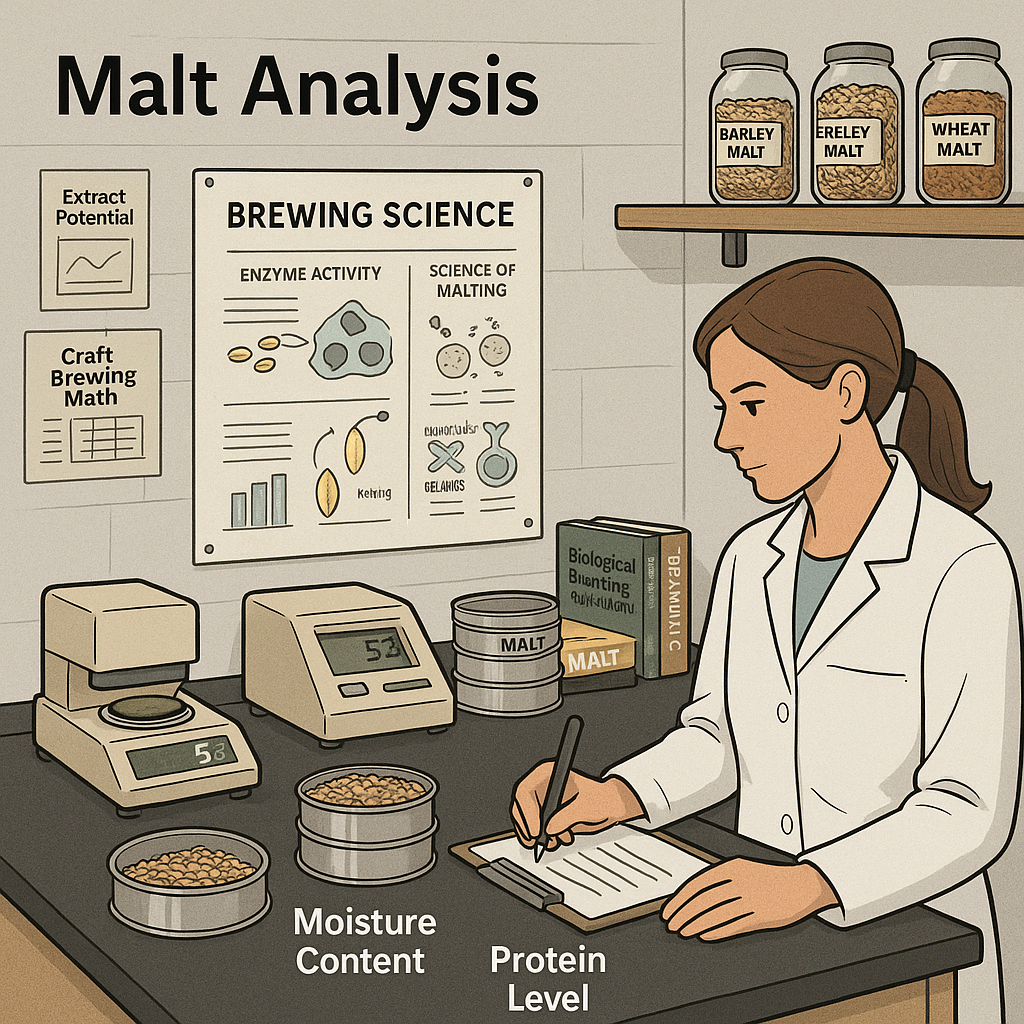
Every batch of finished malt is tested for quality and consistency. Common parameters include moisture content, extract potential, enzyme activity (e.g., diastatic power), color, protein levels, and beta-glucan content. This ensures the malt will perform as expected in the brewhouse.
3. Storage and Conditioning
Malt is typically conditioned and rested for a few days to a few weeks to equalize moisture and stabilize the product. It’s then stored in dry, cool conditions to preserve quality and prevent spoilage.
4. Packaging and Shipping
Once stabilized, malt is packaged—either in 25 kg/50 lb bags or in bulk—and shipped to breweries. Specialty malts may be handled separately to avoid cross-contamination and preserve their distinct characteristics.
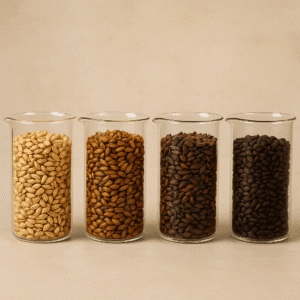
Specialty Malts
Specialty malts are produced by modifying the kilning and roasting processes after standard germination.
Unlike base malts—which primarily provide fermentable sugars and enzymes—specialty malts contribute
distinctive flavors, colors, and aromas to the finished beer.
The production of specialty malts depends on temperature, time, and technique. Some are lightly kilned
to preserve enzymatic activity, while others are roasted at high temperatures to create rich, dark colors
and complex flavors such as caramel, chocolate, coffee, or biscuit.
Categories of Specialty Malts
1. Kilned Malts (Low to Moderate Temperature)
These include Pilsner Malt, Pale Ale Malt, Vienna Malt, and Munich Malt.
Kilned at 60–115 °C, they develop deeper malt flavor while retaining some enzymatic power.
2. High-Temperature Kilned & Drum-Roasted Malts
Examples include Brown Malt, Chocolate Malt, and Black Malt.
Roasted at 160–220 °C, these malts create intense color and bold, toasty, or bitter flavor profiles.
3. Stewed and Roasted Malts
Crystal (Caramel) Malt and Roast Barley are produced by first stewing the grains
to convert starches into sugars before roasting. This process locks in sweetness and promotes caramelized,
burnt-sugar flavors.
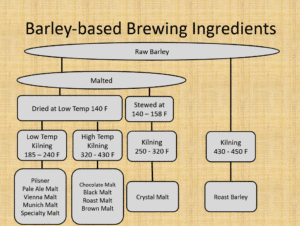
This diagram illustrates how temperature and roasting intensity create a spectrum of malt types.
Specialty Malts
Specialty malts are produced by modifying the kilning and roasting processes after standard germination. Unlike base malts—which primarily provide fermentable sugars and enzymes—specialty malts contribute distinctive flavors, colors, and aromas to the finished beer.
The production of specialty malts depends on temperature, time, and technique. Some are lightly kilned to preserve enzymatic activity, while others are roasted at high temperatures to develop rich, dark colors and complex flavor profiles such as caramel, chocolate, coffee, or biscuit.
Categories of Specialty Malts
1. Kilned Malts (Low to Moderate Temperature)
These include Pilsner Malt, Pale Ale Malt, Vienna Malt, and Munich Malt. They are kilned at lower temperatures (60–115 °C) to develop flavor while retaining enzyme potential.
2. High-Temperature Kilned & Drum-Roasted Malts
These include Brown Malt, Chocolate Malt, and Black Malt. Roasting intensifies color and produces deep, toasty, or bitter flavors (160–220 °C).
3. Stewed and Roasted Malts
Crystal Malt (120–160 °C) and Roast Barley (220–230 °C) are first stewed to convert starches into sugars before roasting—locking in sweetness and creating caramel or burnt-sugar notes.
Visual Summary

This diagram outlines the range of malt types produced from different kilning and roasting conditions.
Craft Malt vs. Large Commercial Malt
As the brewing industry has grown, so has the range of malt available to brewers.
While large commercial maltsters still supply most of the world’s malt, the past decade
has seen a rise in craft malt—small, independent maltsters producing regional,
terroir-driven products on a much smaller scale.
What Is Craft Malt?
Craft maltsters typically operate at a regional scale, using locally grown barley and
producing batches from 1–10 tons. These maltsters emphasize:
- Local agriculture and short supply chains
- Unique barley varietals chosen for flavor, not just yield
- Traditional techniques such as floor malting or drum malting
- Distinct flavor profiles that highlight regional terroir
Craft malt is often compared to specialty coffee or artisan cheese — the focus is on
character, story, and connection to place. Brewers choose craft malt to create
beers with deeper complexity or a stronger regional identity.
What About Large Commercial Malt?
Large maltsters operate at industrial scales, producing hundreds of thousands of tons per year.
Their strengths include:
- Consistency and uniformity across batches
- High enzyme potential and predictable performance
- Lower cost per pound through economies of scale
- Global distribution and availability
Commercial malt is essential for most breweries because it offers reliable performance,
stable pricing, and universal availability. For many beer styles—especially lagers and ales
made at scale—commercial malt provides exactly what brewers need.
Which Should Brewers Choose?
Both craft and commercial malt have their place in modern brewing:
- Craft malt → for flavor-driven beers, seasonal releases, and local identity.
- Commercial malt → for day-to-day production, consistency, and cost efficiency.
Many breweries combine both: using commercial malt for the base and craft malt for specialty grains
or limited-edition beers.
Recommended Listening: Craft Malt Deep Dive
The Master Brewers Podcast below provides an outstanding discussion about the evolution of malting,
barley selection, and the challenges & opportunities facing both craft and commercial maltsters today.
Conclusion: Understanding the Malting Process
The malting process transforms raw barley into a brewer-ready ingredient full of flavor, color, and enzymatic potential.
Through cleaning, steeping, germination, and kilning, barley is awakened, modified, and carefully dried to create the malt that forms the backbone of nearly every beer style.
Each stage influences the final malt character: steeping hydrates the grain and initiates growth; germination develops the internal enzymes needed for brewing; and kilning locks in flavor while shaping color, aroma, and fermentability.
By adjusting time, temperature, and airflow, maltsters can create everything from delicate Pilsner malt to rich roasted malts used in stouts and porters.
This section has introduced you to the core principles of malting — the foundation on which all brewing is built.
With this understanding, you’re now better equipped to evaluate malt varieties, interpret malt specifications, and appreciate the craft behind every kernel.
To see the malting process in action, enjoy this guided look inside a working malt house: